BigBlueButton manual for organisers
Manual for organisers shows advanced features for moderators of the sessions and extends the manual for participants.
Recording the session
Moderators of the room will see a button Start recording at the top of the meeting room.
To record, click on the Start recording button.
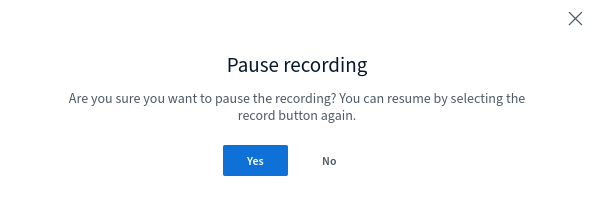
A pop-up will notify you that you can pause the recording and resume it later. Click Yes to start recording.
The Start recording Button will change and indicate the length of recording.
To stop the recording click on the button again. After confirming you want to stop recording in the pop-up notification your recording will be stopped.
After you end the meeting the recording will become available on your main room page. It usually takes a few minutes for the recording to be available.
Note: If you record the meeting for one second all the notes and chat will be saved as the result.
Make participant a presenter
As only one user can be a presenter at the same time, user with moderator role will need to assign Presenter role to the user that needs it. Moderator can also take away the presenter role and assign it to themselves.
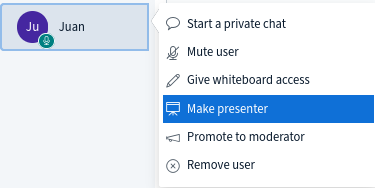
To give Presenter rights to the user, click on their name in Users list and select Make presenter.
To get Presenter role back, click on your name and select Take presenter.
Promote participant to moderator role
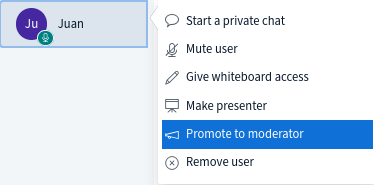
To promote the participant to moderator role click on their name and select Promote to moderator. Now they will have the same rights to manage the room as you have.
Managing presentations
For best results uploading an Adobe Acrobat document (.pdf) document is recommended, although BigBlueButton will accept other file formats, for example Office documents (.doc .docx .pptx), text documents (.txt), images(.png , .jpg).
Please note the maximum size is 30 MB or 150 pages per document. You can upload multiple documents as long as they are under the size restrictions.
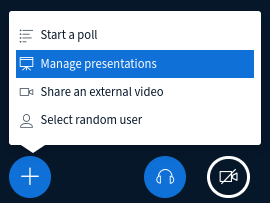
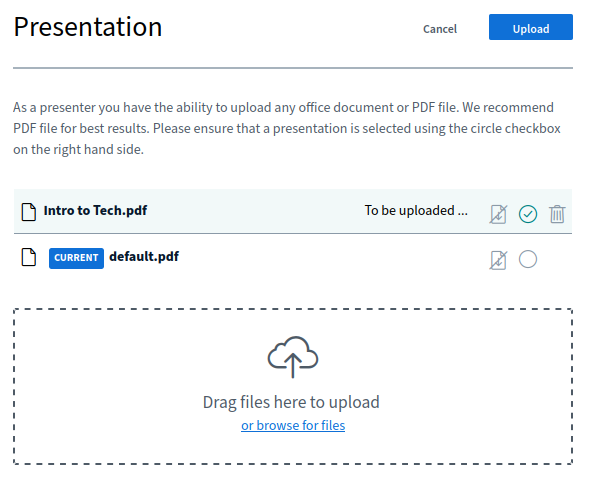
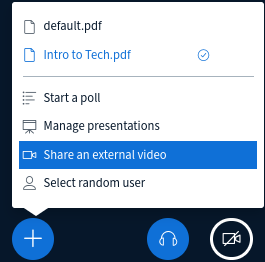
To upload a presentation first click on the blue (+) button at the bottom and then select Manage presentations.
A window where you can upload your presentation will open.
The default presentation is on the top of the list and you can add new ones by dropping them on the Drag files here to upload area or selecting them by clicking the upload area or browse for files link.
After you select the file, it appears on the list with To be uploaded... status
To upload it, click on the Upload button at the top of the screen. It will take a few seconds for the presentation to be uploaded and converted to PDF.
The uploaded presentation will immediately appear in the room (so if you don’t want to show it now, load it beforehand or include an empty slide).
If you would like to select or upload another presentation go to blue (+) button again and select Manage presentations. The current presentation has a label CURRENT and a green circle checkbox.
To select another presentation click in the empty circle and click button Confirm at the top of the page.
If you would like the users to be able to download the presentation then enable sharing by clicking on the down arrow icon next to green circle checkbox. The users will now have a little download icon available in the bottom left corner of the presentation.
To remove a presentation click on trash can icon.
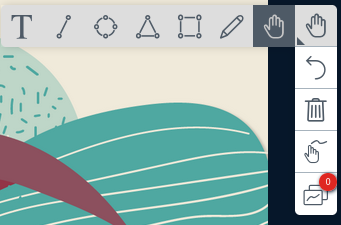
You will be able to use additional features to write and draw over the presentation. Review the available tools by clicking on the hand icon on the left side of presentation. If you are the moderator, you can also make these tools available to other participants. Click on the multi-user whiteboard icon at the bottom to enable it.
Share external video
Next, paste the video URL into the text field and click on the button Share a new video. 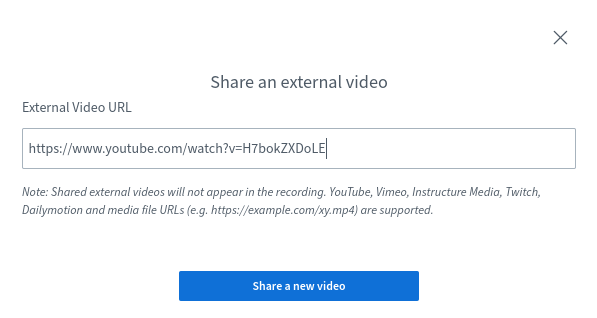
The video will start playing in the main window. Participants can pause and play the video on their screen. Beware that not all participants might see the video as the content of the video might be geo-blocked by YouTube or other services.
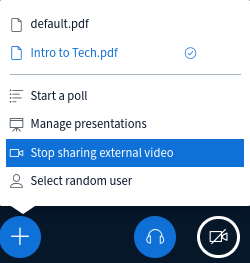
To stop the video click on Plus (+) icon and select Stop sharing external video.
Share screen
As a moderator or presenter you can share the screen. Click on the Share your screen icon below the presentation.
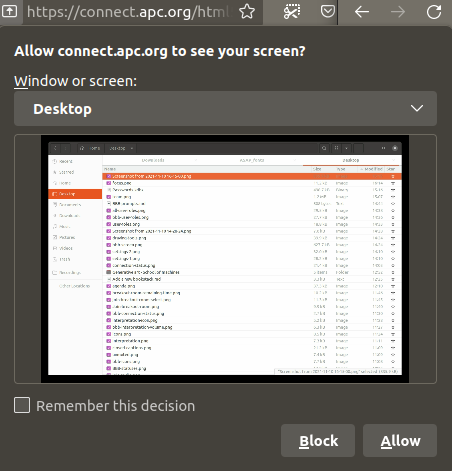
When the browser’s notification pops up select the screen you would like to share:
Confirm your choice with a click on the button Allow.
To stop sharing the screen click on the Screen icon again.
Polls
You need to have a Presenter role in order to run a poll.
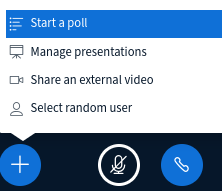
To create a poll click on the blue Plus (+) button and select Start a poll.
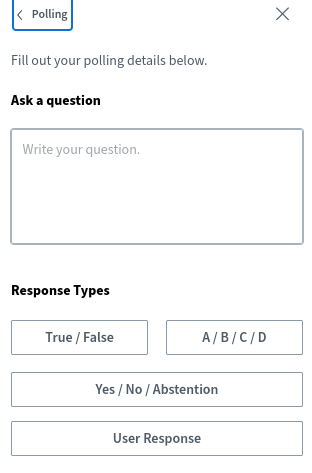
Next you will see a window with poll options. You can select one of the predefined polls or create a custom one.
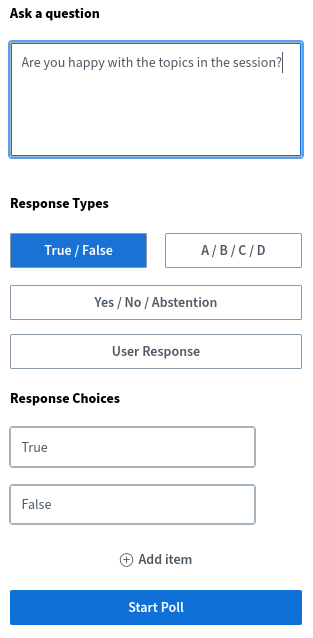
- Enter Ask a question text.
- Select question type: True/False, ABCD (2 to 4 possible customizable answers), Yes/No/abstention, and open ended (each participant can fill out their answer in free text).
- When you are ready click on Start Poll.
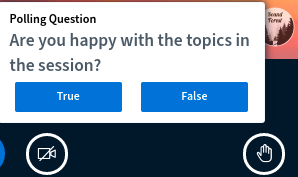
- Each participant will get a message to answer the poll.
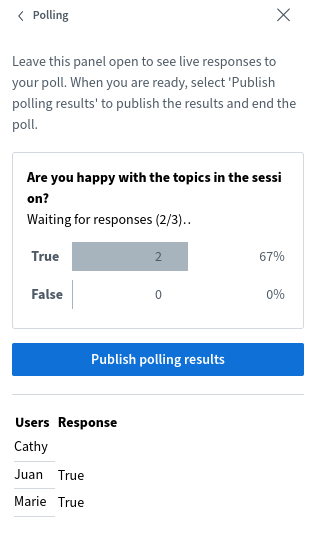
- You will be able to monitor the answers.
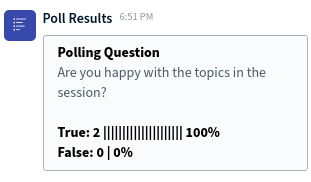
- When the poll has ended select Publish polling results and all participants will see the results in a chat.
Create breakout rooms
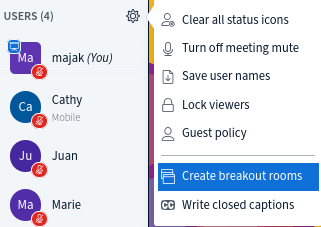
You have to have Moderator role in order to use this feature. Breakout rooms can be created by clicking on the gear icon in the Users list and selecting Create breakout rooms.
Warning: when you enter this menu you cannot manage any other option in BBB until you finalize or cancel the breakout rooms, ie you cannot unmute yourself, nor see the chat. Best practice is to to open another browser tab to create breakout rooms.
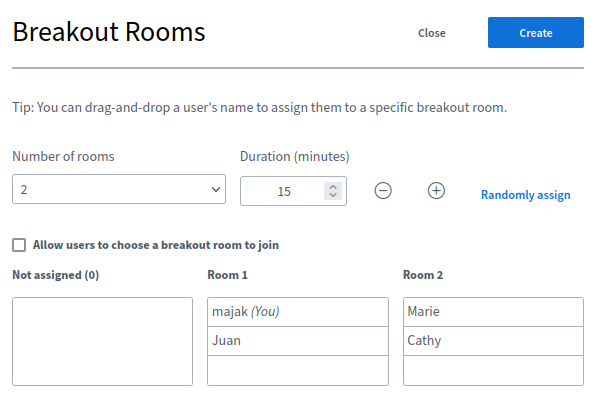
Next select the number of rooms you would like to create (between 2 and 16) and assign users to them.
You can drag and drop the users’ names, randomly assign them to rooms OR let each choose the room that they want to join. You will also need to define the duration of breakout rooms.
Confirm the settings and open the breakout rooms by clicking on Create button.
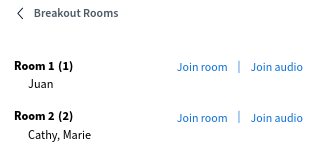
The participants will get a notification to join the breakout room. When they join the room a new tab will open in their browser and mute them in the main room. When participants join the breakout room they will see a notification about remaining time on top of the window.
- Participants will also see the last slide of the presentation shown in the main room.
- The first participant to join the breakout room will have the presenter role. You cannot record breakout rooms.
In the main room any moderator can join any breakout room and move around, as well as join “audio only”.
Participants can be called back to the main room by the Presenter, or can return by leaving their breakout room, which will bring them back to the main room.
Warning: You cannot assign people randomly to rooms if more than one participant is a moderator!
Warning: Breakout rooms can end abruptly, even before the warning countdown is done. It’s important to save/copy notes, especially since breakout rooms cannot be recorded.
You can send private messages to participants in breakout rooms from the main room.
Select a random user
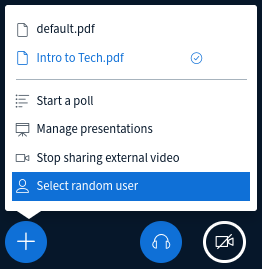
Sometimes you would like to call out a random user and a feature Select random user can help you make a more random selection. Click on the Plus (+) button and Select random user.
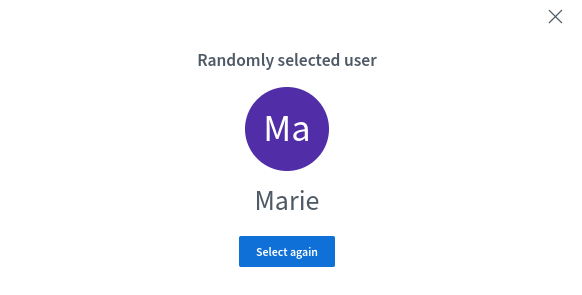
On the screen all participants will see a popup window with a randomly selected user.
Interpretation
Meeting moderator can setup and manage interpretation in several languages.
Activate the interpretation
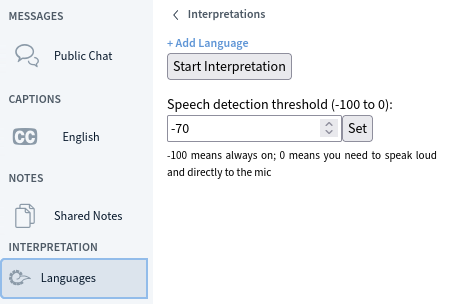
To start interpretation, click Languages in the left sidebar.
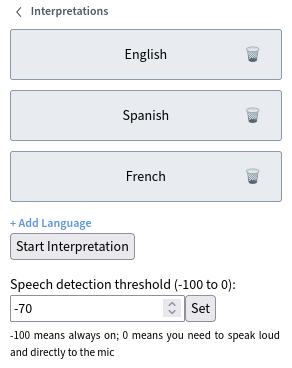
Then introduce the language names (+ Add language) and click Confirm. Define the speech detection threshold for interpreter audio input (between -100 for noisy environments to 0 which means off ): -70 is the default and you can leave it as it is.
When you are ready, click on Start interpretation.
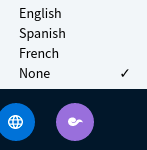
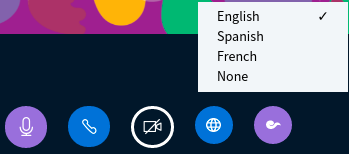
Participants will see a new globe icon that allows them to select any of the interpreted languages.
Assign interpreters
In order to assign interpreters, first promote them to moderators: click on their names in the left sidebar, then Promote to moderator.
When they are moderators, they will see a new, purple button to the far right of the bottom menu. They can each select the language they want to interpret into.
When they are interpreting, their mic icon is violet (instead of the normal blue of participants).
Closed captions
Meeting moderators can enable close captioning on the meeting.
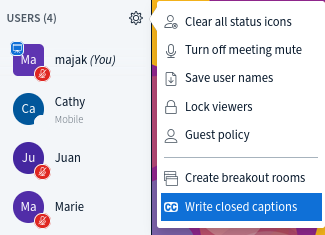
Select the gear icon and Write close captions.
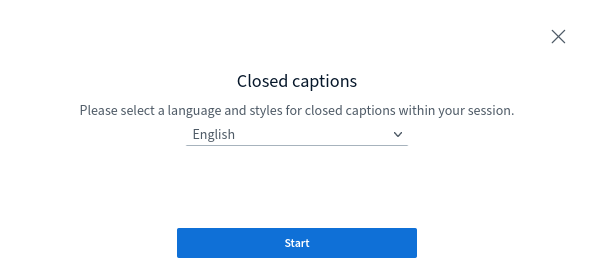
Then select the language.
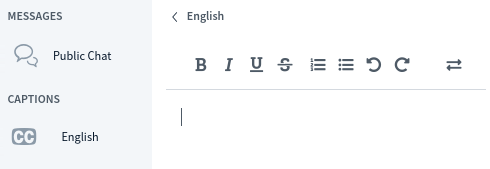
You can start typing text and participants who had enabled CC (clicked on the CC icon) will be able to see the closed captions.
Several people can take turns writing subtitles in the same language.


